It’s one thing to have a free-flowing gutter to channel the rainwater on your roof out of your house, but it’s another to avoid it from marring your home’s exterior appearance.
If your downspouts are giving your home an unsightly look, this guide is for you. As you’ll see, there’s no need to get a gutter specialist or carpenter to handle it.
You can do the DIY project on your own with certain tools. It’ll just take three hours for you to complete it, and also, you’ll typically not spend beyond $50, so all is working in your favor.
Items You’ll Need
First things first, you have to gather the necessary tools and supplies to perform the work yourself. The ones you’ll be needing are listed below.
Tools
- Shovel
- Spade
- Wheelbarrow
- Screwdriver/power drill
- Paper
- Pencil
Parts
- Plastic downspout extension
- New downspout (optional)
- Downspout extension vent (optional)
- Pop-up drain emitters (optional)
Steps to Take to Bury Your Downspouts
Having gathered them, you’re now ready to start the downspout burying work. The steps given below will walk you through the entire thing.
1) Plan your downspout’s route
What we’re going to do is to hide your downspout from the eyes of your guests or passersby.
To do this, you have to first survey your yard to determine the best possible route for your downspout. It has to drain out several feet, ideally eight feet away from your home to a hill or sidestreet drain.
You can also take advantage of structures in your surroundings and hide the downspout extension (the one you’ll be connecting to it later) under or beside them.
2) Dig a trench
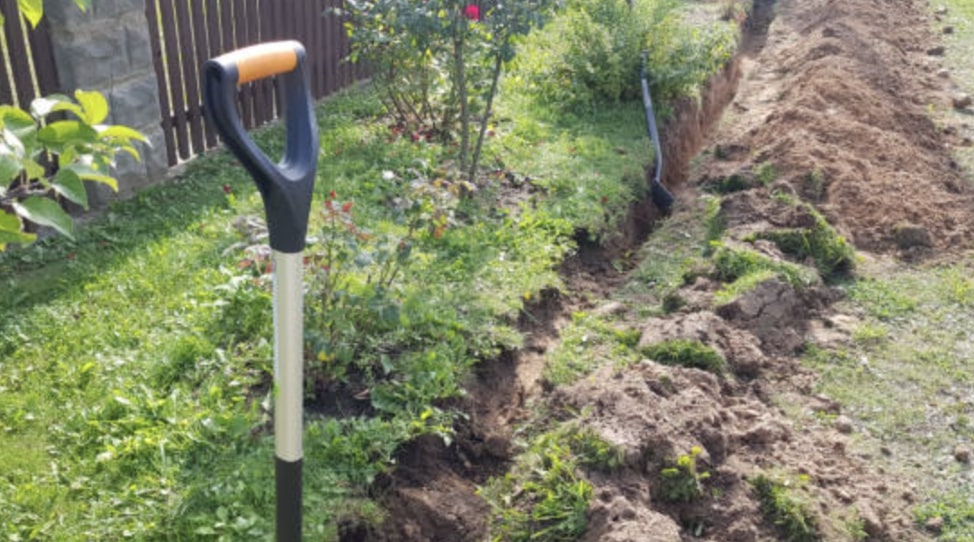
It’s time to start digging, but we advise calling 811, which is a call-before-you-dig specialist. This way, you won’t have done all the hard work only to see the trench occupied by your utility line.
Once you get the go signal, dig down the ground one foot deep using a garden spade to work through the mud. Place the dirt you get on the wheelbarrow next to you.
Just a tip: dig your trench in a gradual downward way. This prevents water from backing up to your yard.
What’s more, if you’re area has frosty conditions, you can dig down up to four feet in the ground. This is so that your downpipes won’t freeze, in which case, you’ll need to thaw it.
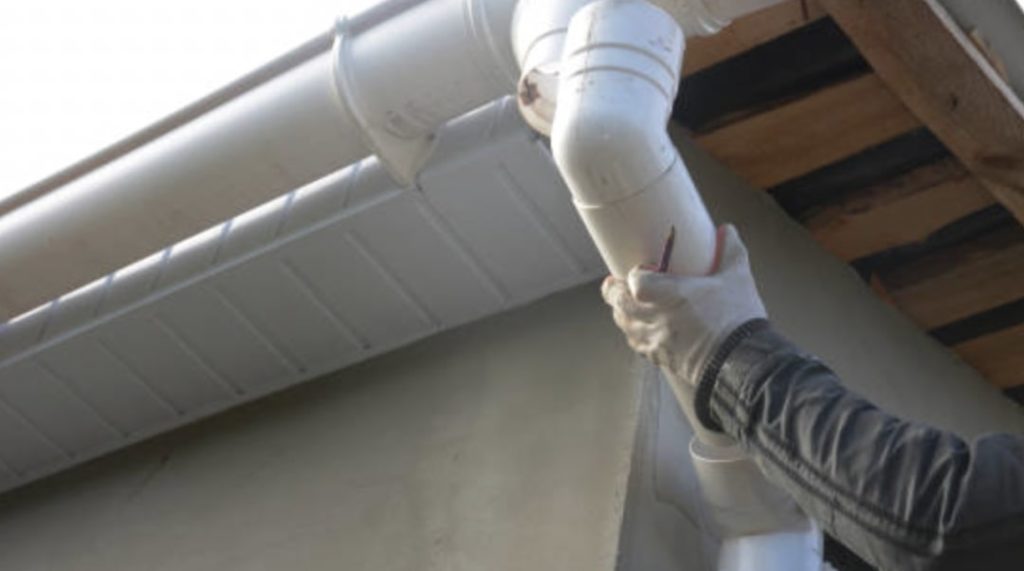
3) Disconnect your old gutter extension

Now unscrew or drill out your old gutter extension and remove it. The angled connector should be taken out leaving only the straight part of the downspout with some space below.
4) Connect your new gutter extension
Equip your downspout with a new plastic, PVC, or aluminum extension. This is the part that you will be burying underneath the ground.
Remember, the end of your new downspout extension pipe should ideally be eight feet apart from your house to draw the water away from it.
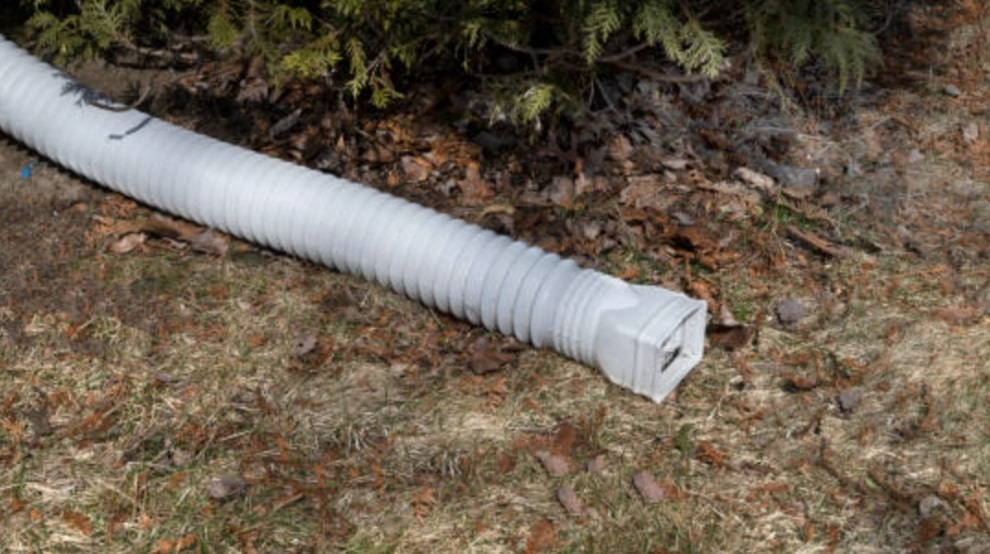
5) Lay your downspout
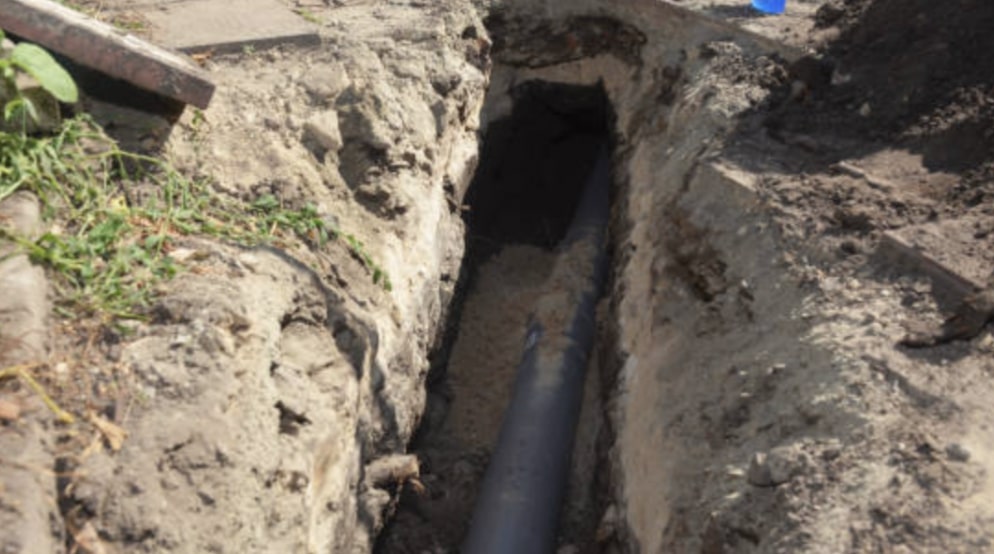
You can lay your downspout extension on the ground. Check if it’s properly in its place and has a gradual decline.
If they look great to you, good work, it’s time to bury it. Use your garden spade and put back the dirt you got to the ground and pat it down firmly to ensure it’s secure.
And you’re all done!
6) Add a pop-up drain emitter

However, you may also want to add a pop-up drain emitter to the end of the downspout extension. Its purpose is to add a stylish touch to your extension and disguise it at the same time.
Furthermore, it acts as a water flow controller and also prevents debris from coming into the downspout. So this means that maintaining your downspout will be a lot easier to do.